Reading time is around minutes.
BIOS -
BIOS is an acronym that stands for Basic Input/Output System. It is meant to control your product at a very low level. As of right now there are three regularly used BIOS formats (there are actually more than that but there are three common ones). These are the AMI (American Megatrends Incorporated), Award, and Phoenix. Asus was one of the first companies (outside of Intel) to fully embrace the UEFI BIOS standard. They have been working to develop this format and give it as much functionality as they can. One of the items that we especially like is the ability to take direct screen shots right from the BIOS. All you need to do this is a FAT32 formatted USB thumb drive and you are good. It is great for keeping information about changes and also works out great for us. 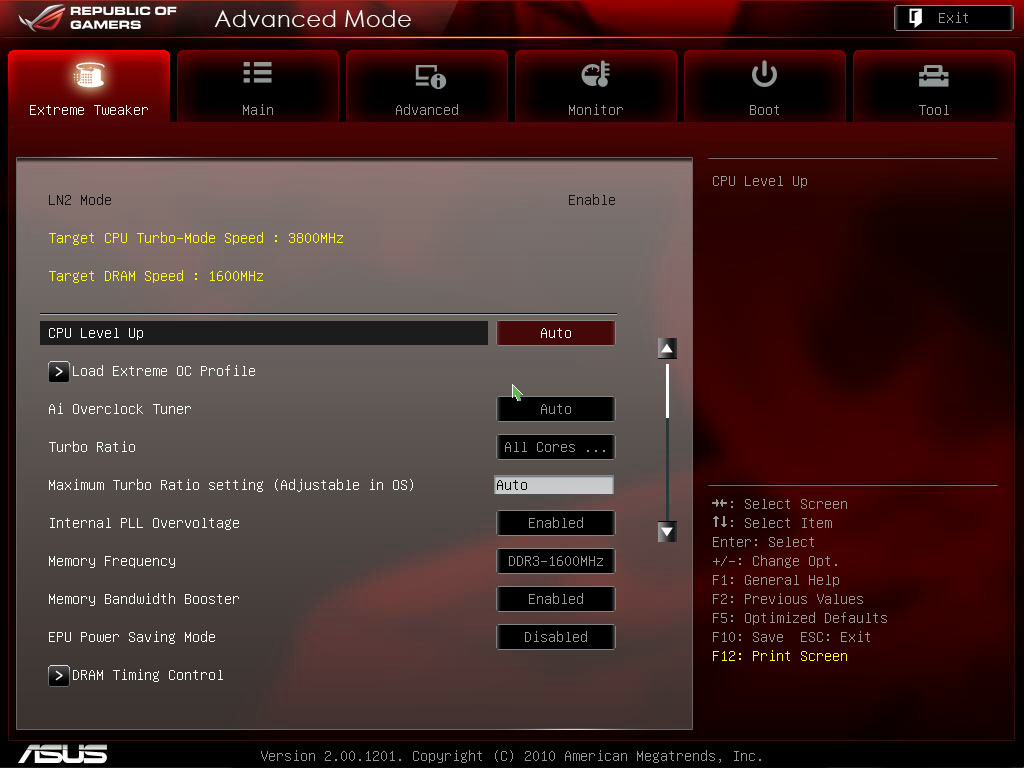
The UEFI BIOS on the Maximus starts you off in advanced mode by default. There is no mucking around with the EZMode, but then again this is a board that is meant to be tweaked. You start off on the Extreme Tweaker pages which are very similar to what Asus offered in their traditional BIOS, but with more input options and flexibility.
 |
 |
One thing to talk about (although we have covered it before) is the Digi+ VRM. The Dgig+ VRM on the Maximus IV Extreme (Ok, moving forward we will call it the MIVE) is the 6th generation of Asus’ power controls for their motherboards. They were right after DFI when it came to the flexibility of power controls, but while DFI could not continue to innovate, Asus was able to push forward and has built on their platform to allow even greater control. With the launch of the P67 chipset they started pushing the Digi+ VRM into their mainstream products. We will cover what you can do with Digi+ a little more in-depth when we talk about AI Suite II.
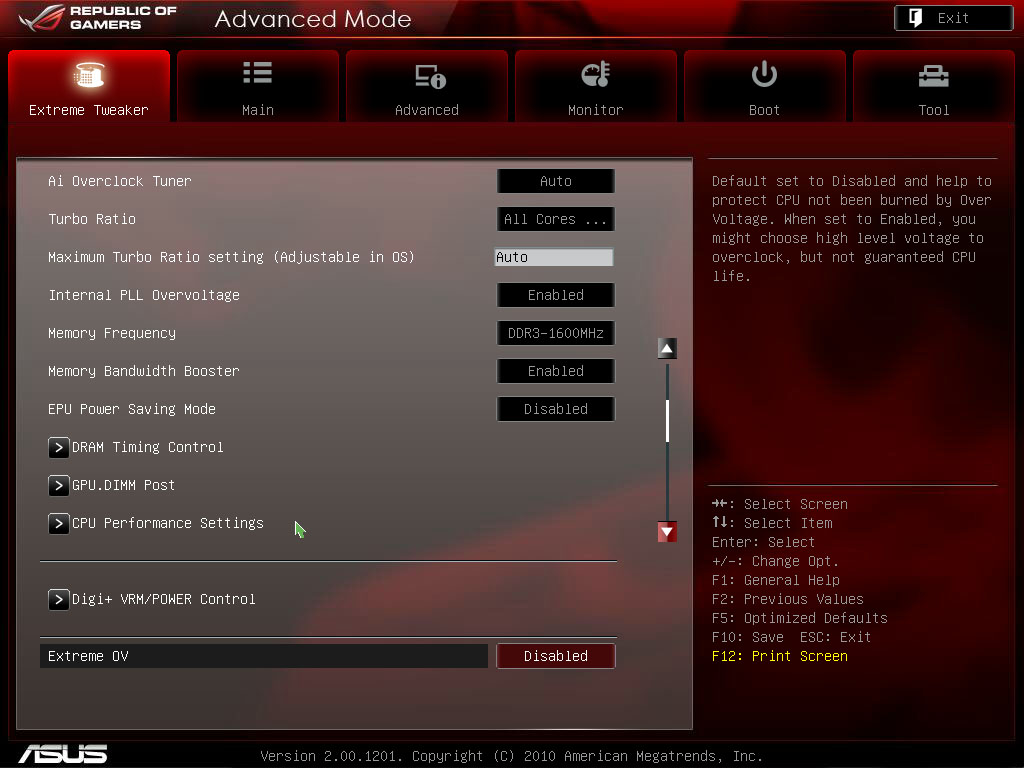
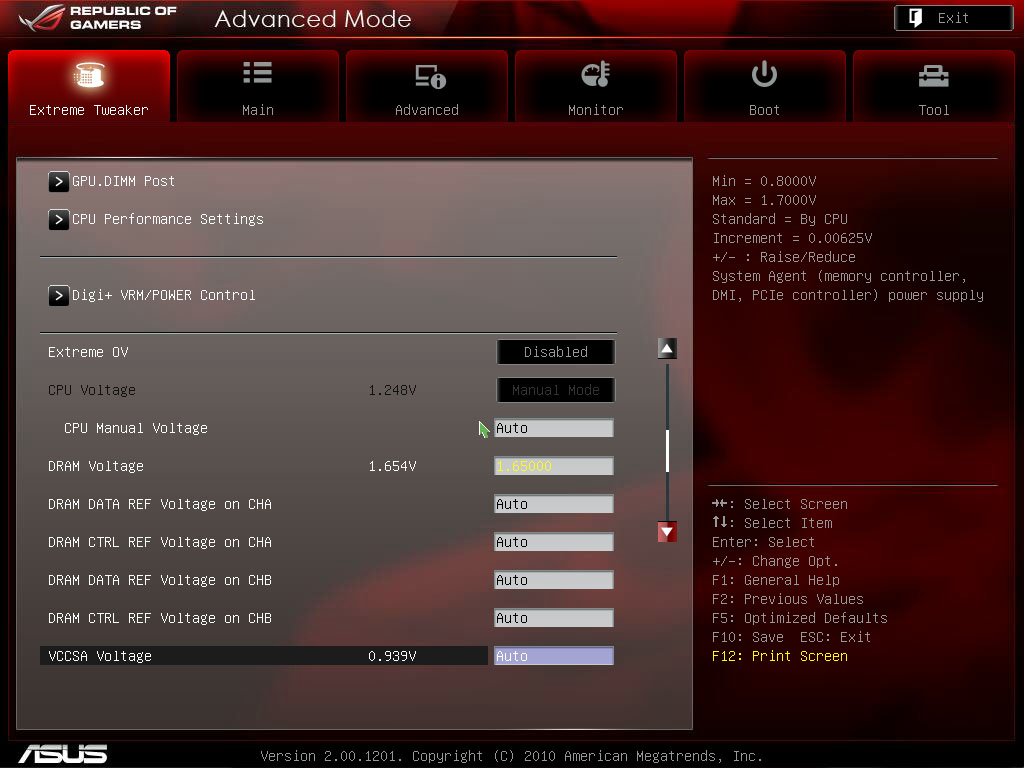
The rest of the Extreme Tweaker Section will look very familiar and has the controls you need/want to get the most out of your CPU. As for the rest of the BIOS, the UEFI makes it much easier to maneuver around (as you can use the mouse), but Asus has not left out things like direct input. You can still key in the numbers you want to get things going quickly. You also do not get the lag or incorrect mouse translation like you have on other UEFI BIOSes. With the Asus version the mouse movement is smooth and the layout is very clean. We have a gallery of the BIOS on the MIVE below.
{gallery}Reviews/01-23-2012/Maximus_IV_Extreme/Part_II/bios{/gallery}
Overclocking -
I have one thing to say about the overclocking on the MIVE; Wow. We have been trying to get to 5GHz stable on a number of motherboards and despite multiple tweaks and tries we have always had to drop back to 4.9GHz. This was not the case on the MIVE. We went straight to 5GHz and everything just worked. We are more than confident that with some extra work we can get this board to hum along nicely at 5.2 or even higher as of this writing we have all but Lightwave 3D running smoothly at 5.2GHz so we know that this is well within reach.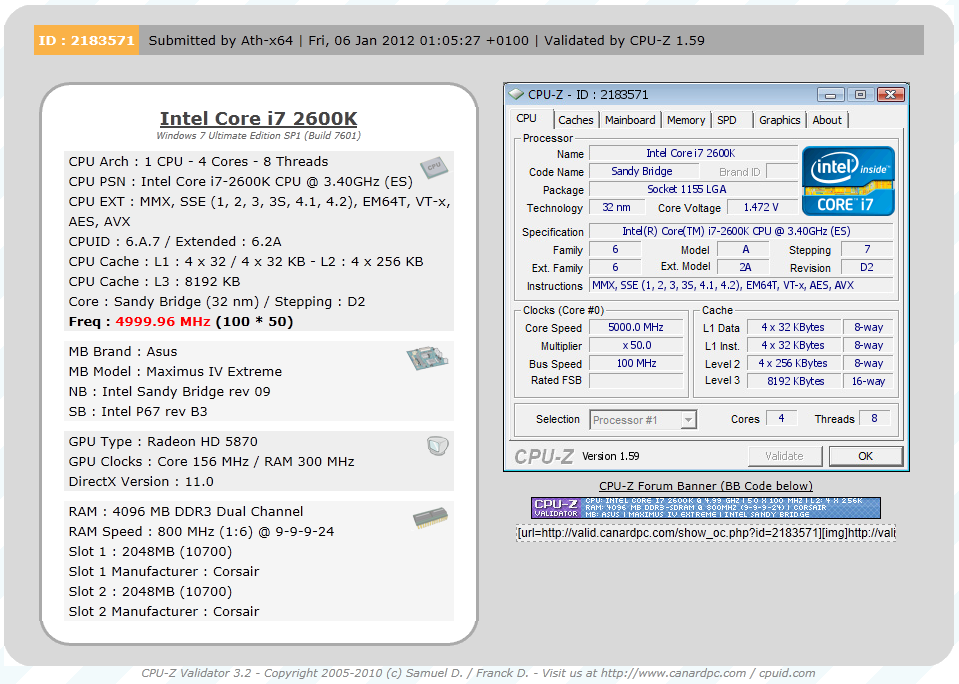
Of course overclocking is a picky subject. I can buy to identical CPUs from the store and they will not always perform the same way under stress. This is the same with motherboards, RAM and GPUs. So again it is important to keep in mind that our results represent a specific hardware configuration. Yours may be similar but will rarely be identical.
Overclocking Tools -
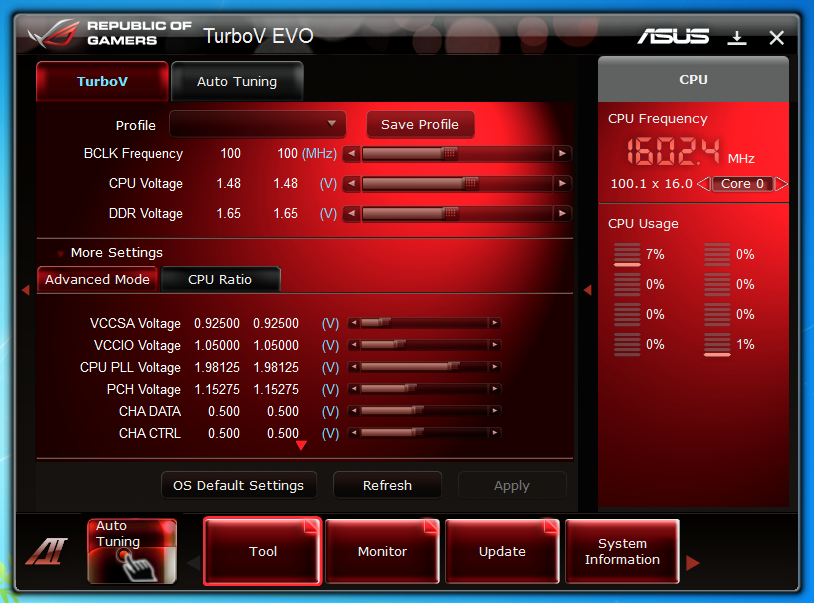
Asus’ overclocking tool is called AIsuite II (like you did not know that). It is probably one of the best Windows based tools available. This is not just in functionality, but also in ease of use and the look of the software. 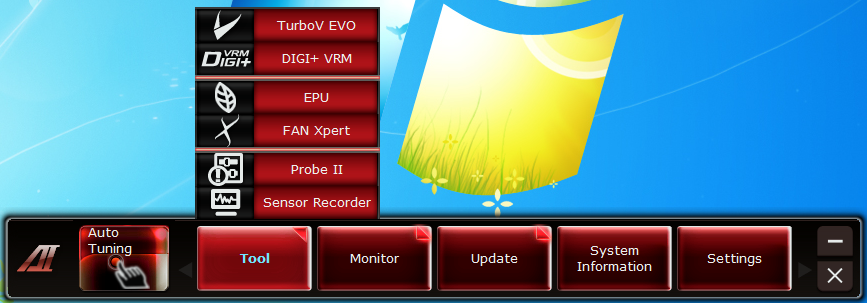
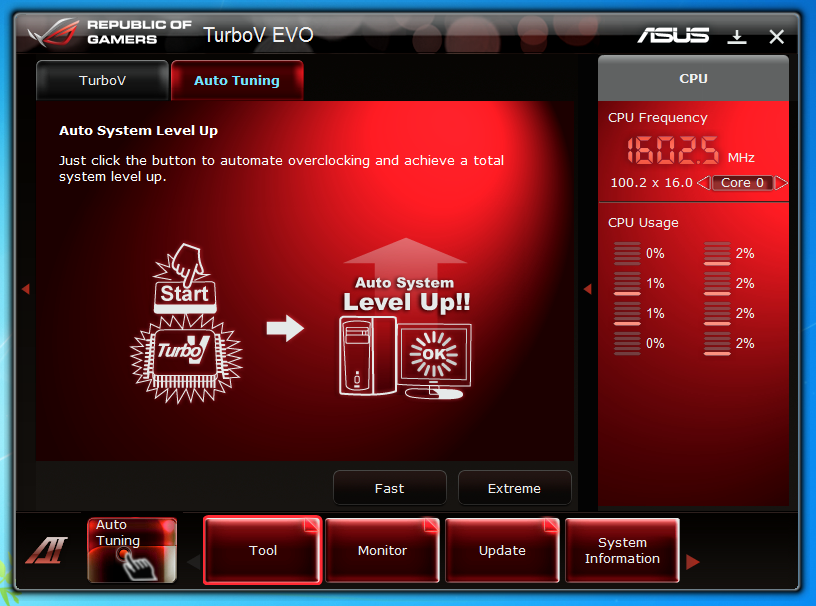
The version on the MIVE is a little different than what we are used to on the Extreme products from Asus. Normally the auto-tuning function is not available (they figure you are going to want to tweak it on your own). On the MIVE that tool was present, but it was not all that great for getting a nice high clock speed. Our run with the Auto Tuner (using the extreme profile) only got us to 4.5GHz, this is a speed that is we have easily hit before so we were actually surprised to see it stop there.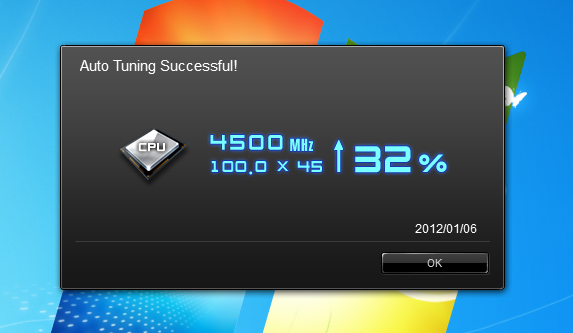
The rest of the AISuite II is very functional and designed with the overclocker in mind. There is even an entire page devoted to the Digi+ VRM. Here you have great options for adjusting the Phase Control, Load-Line Calibration, Current Protection, and even the Switching Frequency mode. Each of these plays a very important role in overclocking.
 |
 |
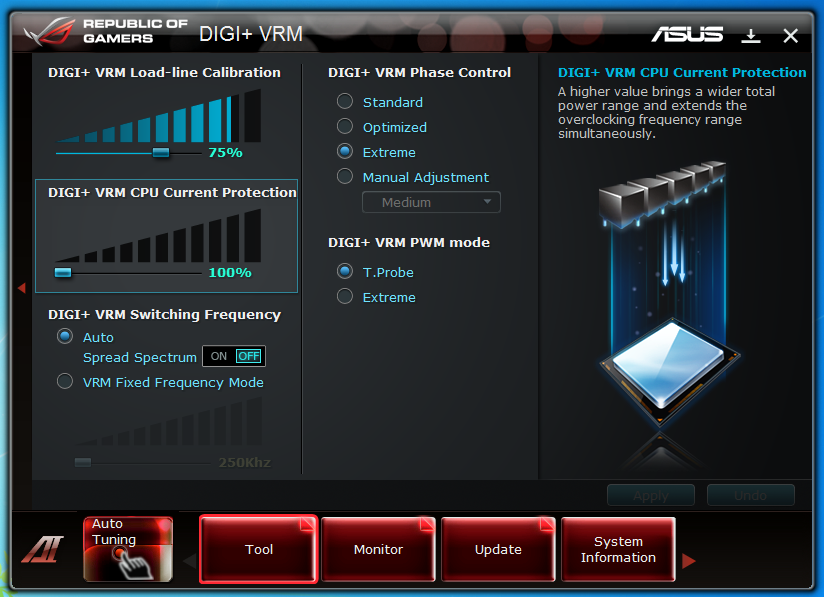 |
Current Protection allows you to extend the amount of voltage available to the CPU so that you can push it higher (this will be even more important in the 3xxx Seires Core i7s).
Load-Line Calibration helps to prevent voltage droop when overclocking and provides more stability to your memory subsystem.
Phase Control and Switching Frequency are design to help overcome crosstalk and signal bleed at high frequencies and when you are pushing a lot of power through your system.
The design is very visual and lets you quickly adjust each of these to get the best result.
 |
 |
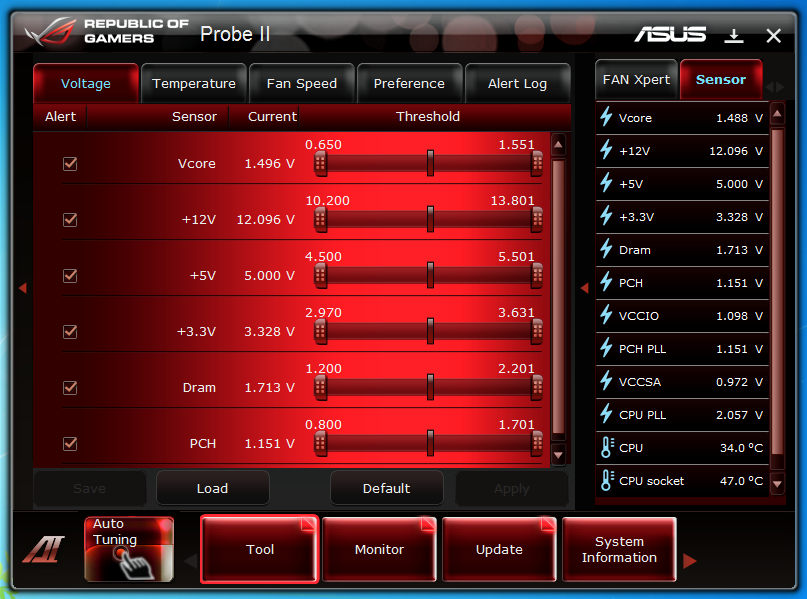 |
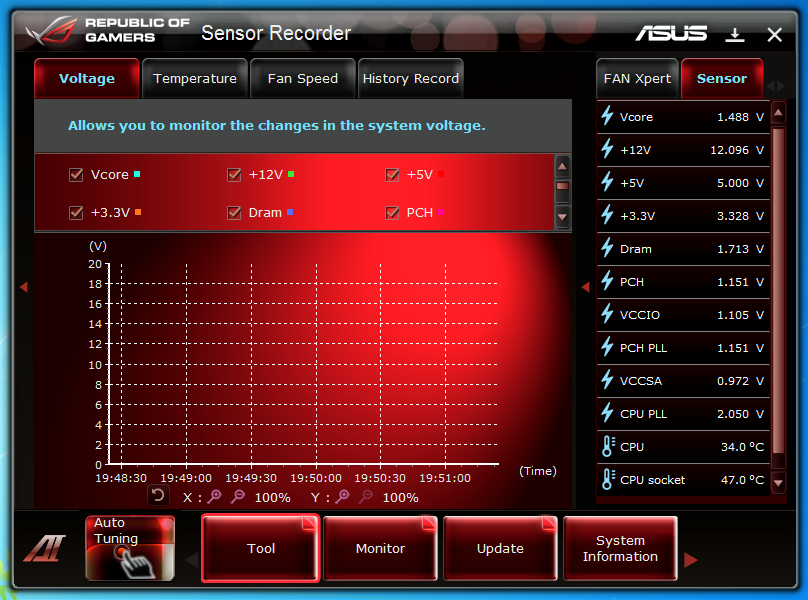
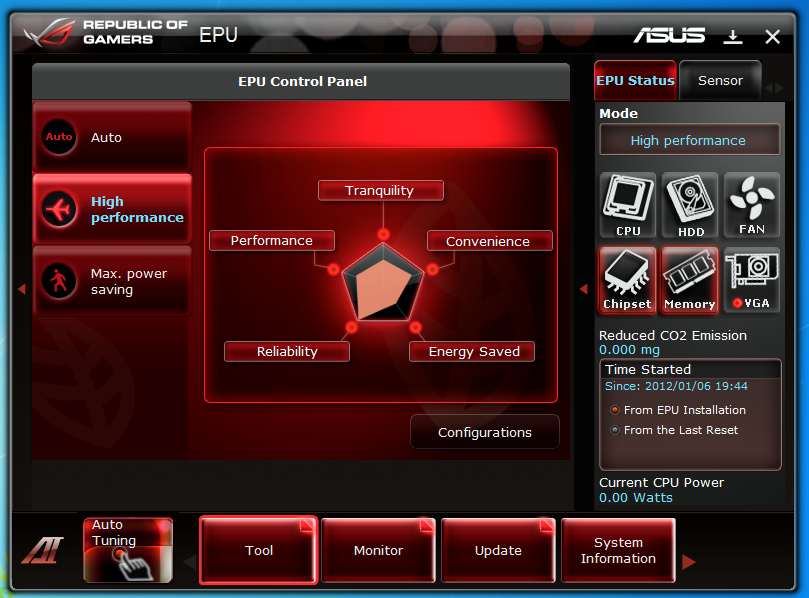
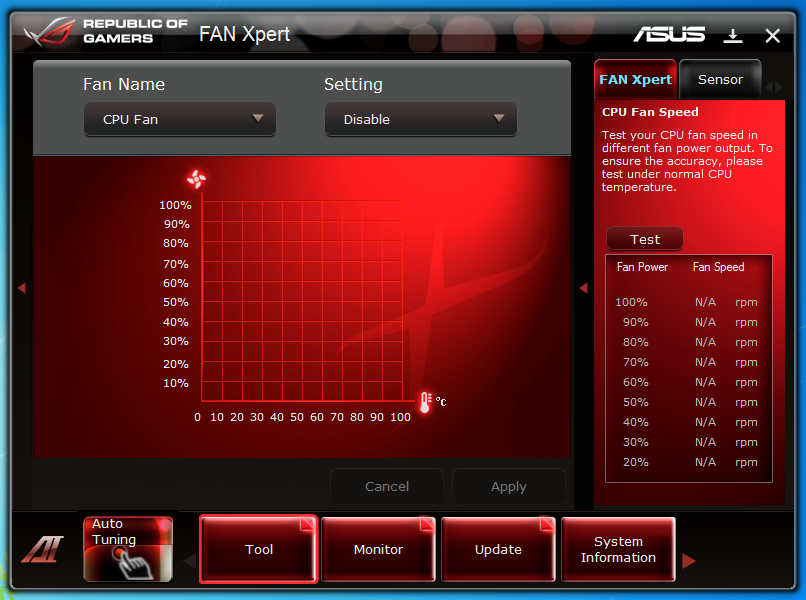
Asus has also included their EPU software on the MIVE which it handy if you are choosing to run this at stock speeds. If will help you get the most power efficiency out of your board. On the other hand if you are overclocking, well it will only run in high performance mode. Asus did not leave out tools to monitor and control the fan headers on the MIVE. You have complete Fan Xpert controls along with an improved Probe II software suite to keep track of all of your voltages, temperatures and even the fan speeds on your system.
 |
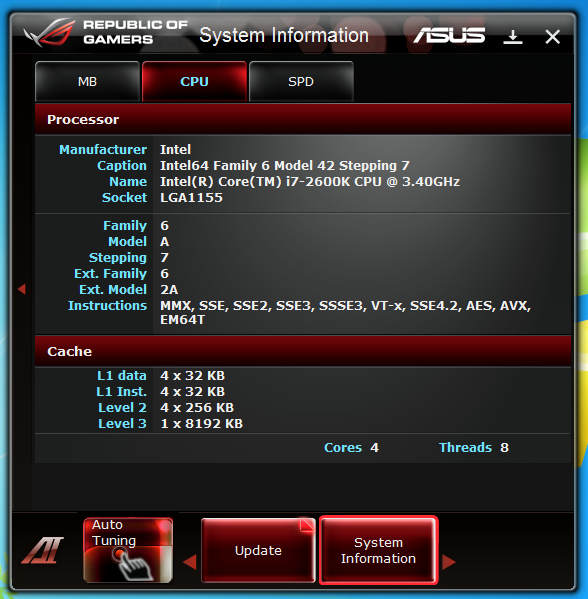 |
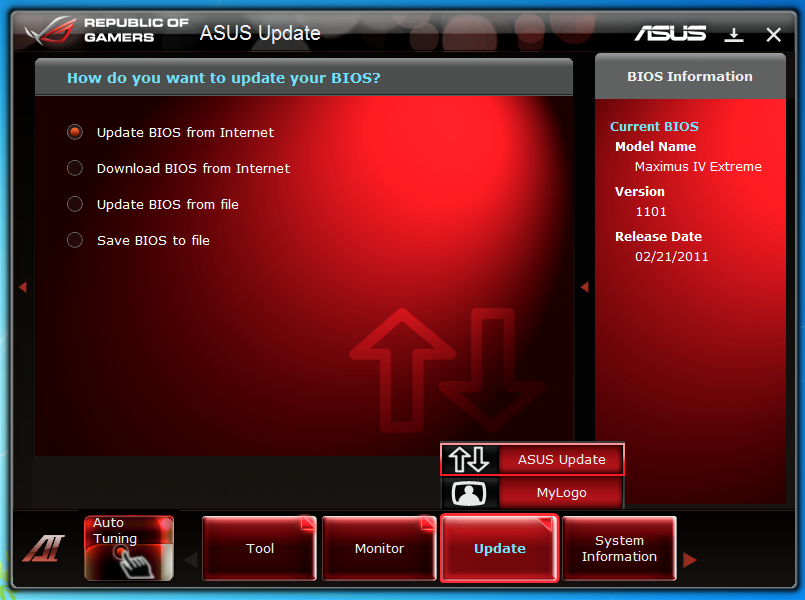
The Update and System information pages are self-explanatory so we will just leave you with the screen shots.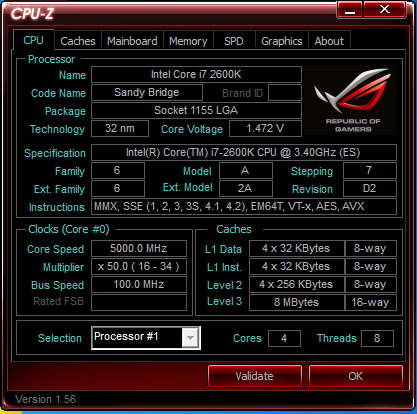
A new feature on the ROG boards is an Asus branded version of CPUz. Unfortunately the one here was out of date so we could not use it to upload our overclock with it. We had to grab a current version and then push it up. Still it does look cool and is nice for screen shots.
ROG Connect -
This suite of applications lets you overclock your system remotely via USB or through the BT Connect software. Although both are very cool and fun to play with we found them somehwat gimicky for most users and was not soemthing that we could see someone using consistently. Still as we said both of these utilities are fun to play with.
