Anyway, there is an easy way to check for the status of Recall. You can run the following command in an elevated PowerShell window (right click on the PowerShell Icon and select run as Administrator)
Dism /online /Get-FeatureInfo /FeatureName:Recall
If Recall is enabled, you will see the following output:
Feature Information:
Feature Name : Recall
Display Name : Recall
Description : Recall application.
Restart Required : Possible
State : Enabled
Custom Properties:
(No custom properties found)
The operation completed successfully.
Running the following command will disable it quickly enough:
DISM /Online /Disable-Feature /featurename:Recall
So, it is not really a big deal, however, what happens when Microsoft pushes out the next update to Windows 11 and everything gets restarted? This is likely what many are concerned about (especially given it being enabled in the first place).
As I work with many SMB and SME clients the question was given to me and I developed a simple script to check for Recall and disable it if it shows as enabled. It uses the same two commands above but adds in logic to do something when it sees what it is looking for.
This first part is building a variable, this habit is something of a leftover from my development days (Python etc.) where setting up an input variable can make things easier when you have a lot of data to parse through from multiple input types or sources. Because of this I tend to use this method instead of just pulling everything out in a single string.
It also allows me to step through the script as a build it.
The variable in question here is “$RecallEnabled” I want this to be the value of the Recall Feature “State”. To do this I have the DISM (Deployment Image Servicing and Management tool) pull the status, but then use findstr to find the “State” string.
$RecallEnabled = Dism /online /Get-FeatureInfo /FeatureName:Recall | findstr /B /C:"State"
There are other ways to do this including using “Get-“. For example ((Get-WindowsOptionalFeature -Online -FeatureName Recall).State -eq "Enabled"). I will show you that side as well.
Next, I created an If, Then, Else function.
If ($RecallEnabled -Match 'State : Enabled')
{
DISM /Online /Disable-Feature /featurename:Recall
}else{Write-Host "Recall Already Disabled"
}
This uses the data from the variable $RecallEnabled and looks for a match of the phrase ‘State : Enabled’ If it finds a match it runs the command to disable the Recall feature, if it does not it writes “Recall Disabled” to the PowerShell window or the MDM log.
Here is the whole script with an added OS check:
$RecallVersionCheck = Get-ComputerInfo -Property "*version" | findstr /B /C:"OSDisplayVersion"
If ($RecallVersionCheck -match 'OSDisplayVersion\s*:\s*(2[4-9]|[3-9]\d)[H]([1-2]|\d+)')
{
$RecallEnabled = Dism /online /Get-FeatureInfo /FeatureName:Recall | findstr /B /C:"State"
If ($RecallEnabled -Match 'State : Enabled')
{
DISM /Online /Disable-Feature /featurename:Recall
}else{Write-Host "Recall Already Disabled"
}
}else{Write-Host "Version Wrong For Recall Feature"
}
Now I mentioned a different method to do this, which uses cmdlets instead of external tool calls. This is what that looks like:
If ((Get-WindowsOptionalFeature -Online -FeatureName Recall).State -eq "Enabled")
{
(Disable-WindowsOptionalFeature -Online -FeatureName Recall
}else{Write-Host "Recall Already Disabled"
}
a complete script looks like this:
$RecallVersionCheck = (Get-ComputerInfo -Property "OSDisplayVersion").OSDisplayVersion
If ($RecallVersionCheck -match '^(2[4-9]|[3-9]\d)H[1-2]$')
{
If ((Get-WindowsOptionalFeature -Online -FeatureName Recall).State -eq "Enabled")
{
Write-Host "Recall Enabled - Disabling Recall"
Disable-WindowsOptionalFeature -Online -FeatureName Recall
}else{Write-Host "Recall Already Disabled"
}
}else{Write-Host "Version Wrong For Recall Feature"
}
The results are the same in the end so either will work.
Now let’s take the script of your choosing and copy it from here into a text editor (like notepad or notepad++) Once it is pasted there you will want to save it, chose save as from the menu: In notepad++ you have an option for PowerShell (.ps1) files, in notepad you need to select “All files (*.*) as the file type and then save it as a .ps1 file (replacing the .txt).
Save this to a location and remember the path, you will need it when we set up the task scheduler.
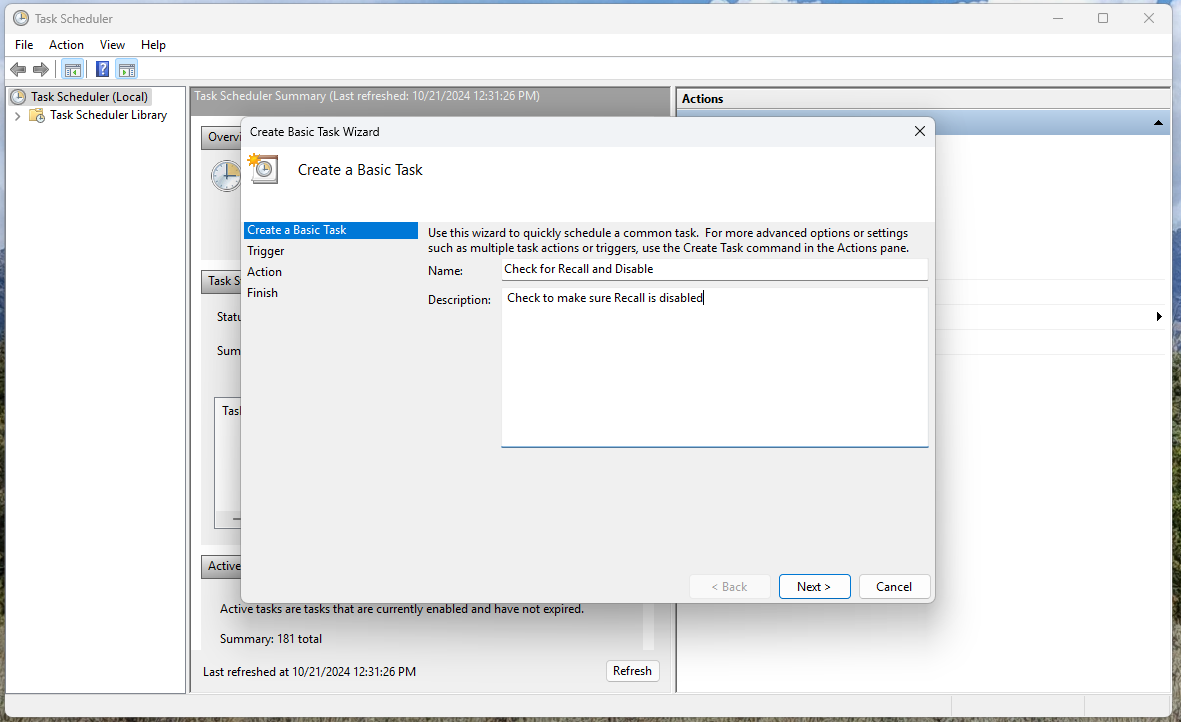
Next, open Task Scheduler. Once it loads click on Create Basic Task
In the window that opens give the task a name and a description (as shown below)
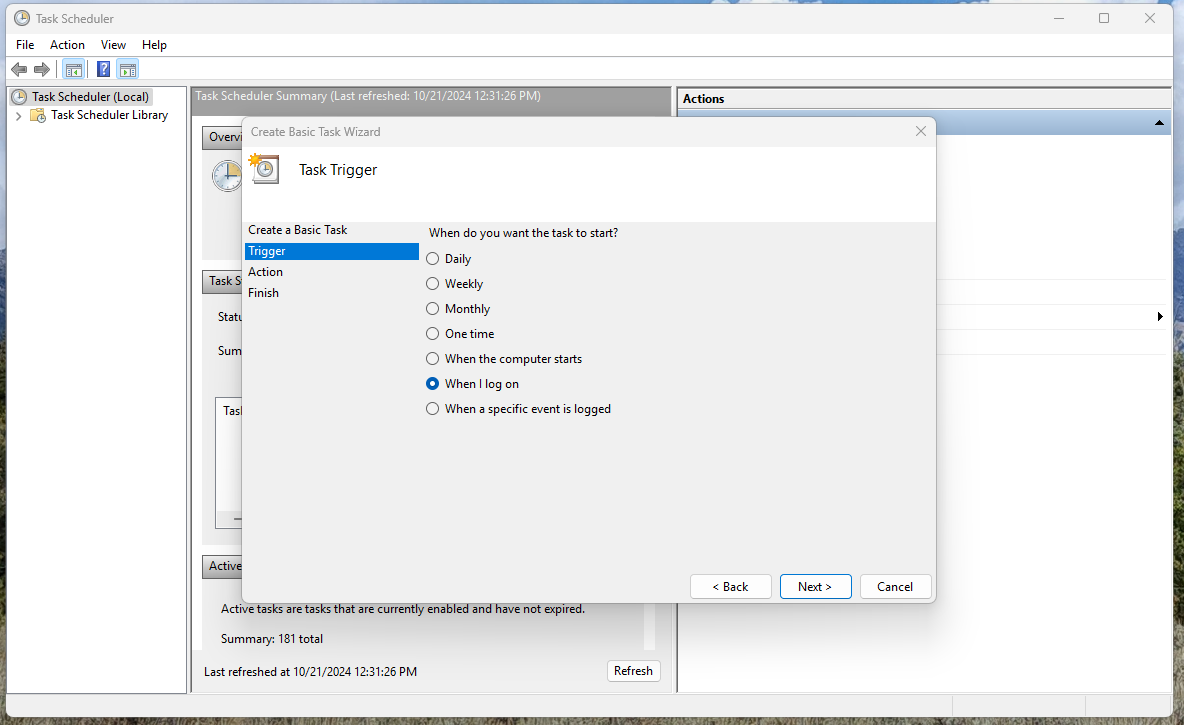
clicking on next brings you to the trigger options. Here you can set this to run on a schedule of your choosing, for a quick task like this, user log on is what I would recommend. It says when “I” log on, but we will change that in a bit so that any user logging on will get this check run.
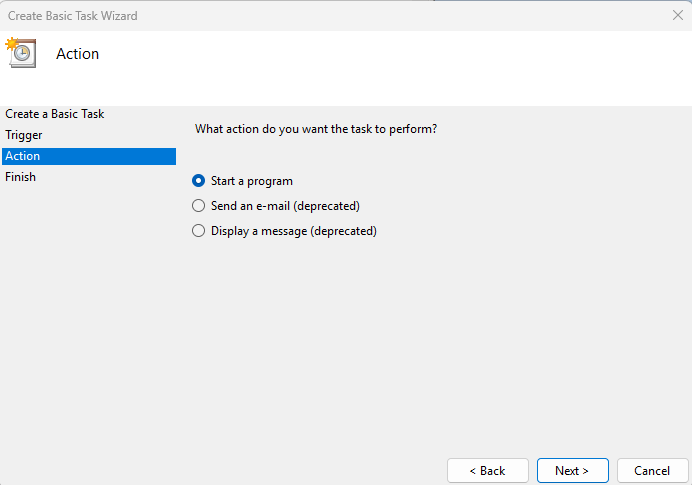
The next window asks us what we want to do. Since we want to run a PowerShell script, we tell it we wan to open a program.
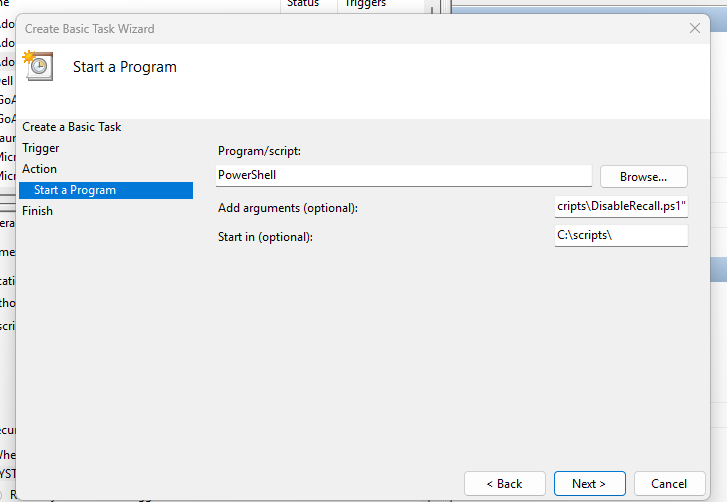
The next window takes some additional input. In the Program/Script dialog box type PowerShell.
In the Add Arguments section you are going to tell the system to allow script execution (-ExecutionPolicy Bypass), point to the file and for good measure add in the -NoProfile switch
-NoProfile -ExecutionPolicy Bypass -File "C:\scripts\DisableRecall.ps1" I used C:\scripts\ as a generic location and Disable Recall as a generic name for the script, you will want to use the name you saved the script as and the path where you save it.
In the Start in dialog box enter the path where your PS1 file is located.
On the next window you are finishing up with the basic settings. However, there are some changes we need to make so you want to make sure you check the Open Properties dialog for this task when I click Finish.

When the Properties dialog opens change the following items
Ensure run with Highest Privileges is checked
Change Configured for to Windows 10

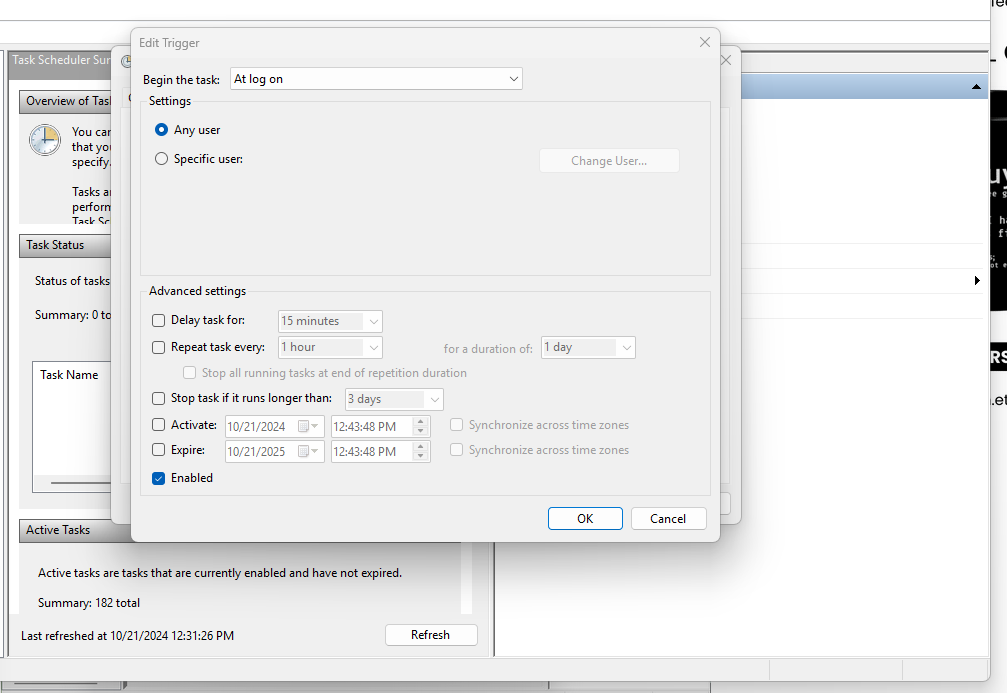
Click on the Triggers tab, highlight the trigger that is there and then click edit.
In the window that opens change the setting from “Specific user:” to “Any user” and then click Ok
You can close the task by clicking OK. If you want to test the task you can find it in the list of tasks, right click it and select run.
This How-To is meant for people who might not have the benefit of an MDM or other controls (like Group Policy) that would come with a more complex environment. It is provided as-is and with no warranty expressed or implied.
Anyway, just my 57 cents..
If you do have any issues with getting this set up or you would like help with getting this set up in your exising MDM, you can reach out to me on X in the thread on this or email us at
