BIOS -
BIOS is an acronym that stands for Basic Input/Output System. It is meant to control your product at a very low level. As of right now there are three regularly used BIOS formats (there are actually more than that but there are three common ones). These are the AMI (American Megatrends Incorporated), Award, and Phoenix. With the launch of the P67 the majority of Intel based motherboard BIOSes have switched over to the EFI style BIOS. The Big Bang Marshal has MSI’s version of this BIOS, which looks a little cheesy to be very honest with you. But, looks can often disguise good performance.
 |
 |
 |
When you hit the landing page you will see five icons, however the one in the middle is the one that will occupy the most of your time. Still we will start off with the Green Power page first. Here, as you can imagine you will find all of the settings that let you get the most power efficiency out of the Big Bang Marshal. There really are some great features here, but I just have this feeling that if you picked up this board you are not looking to try and reduce your power bill. The features here are not useless though and are an indication that MSI has put a lot of work and thought into the power design of this board.
 |
 |
 |
Moving over to the Utilities page MSI provides you with a Memory Test, a Live Update tool, an HDD image backup utility and a way to customize your boot screen with images of your own (just like Capital One). To get this to work you will need a FAT32 formatted device with a .BMP or .JPG file on it. From there it will upload it to the system and use that instead of the normal boot screen.
 |
 |
Since we are working in order we now come to the Overclocking pages. If you were thinking you were getting something different here you are going to be a little disappointed. The layout is different and it is easier to move around (with the help of your mouse). We found it very easy to move around in and to get a quick over view of things when we were looking to make changes during our overclocking. The next Icon is titled Games. This is one that I think is here because it is part of the Click BIOS from MSI. I do not know many overclockers or enthusiast that would be interested in playing games in the BIOS. The last screen is the Settings page. Here are the things like the M-Flash (odd since there is a Live Update here too), your security settings, Boot options the system status and the Advanced system settings. It is also where you go when you want to save your changes.
Overclocking -
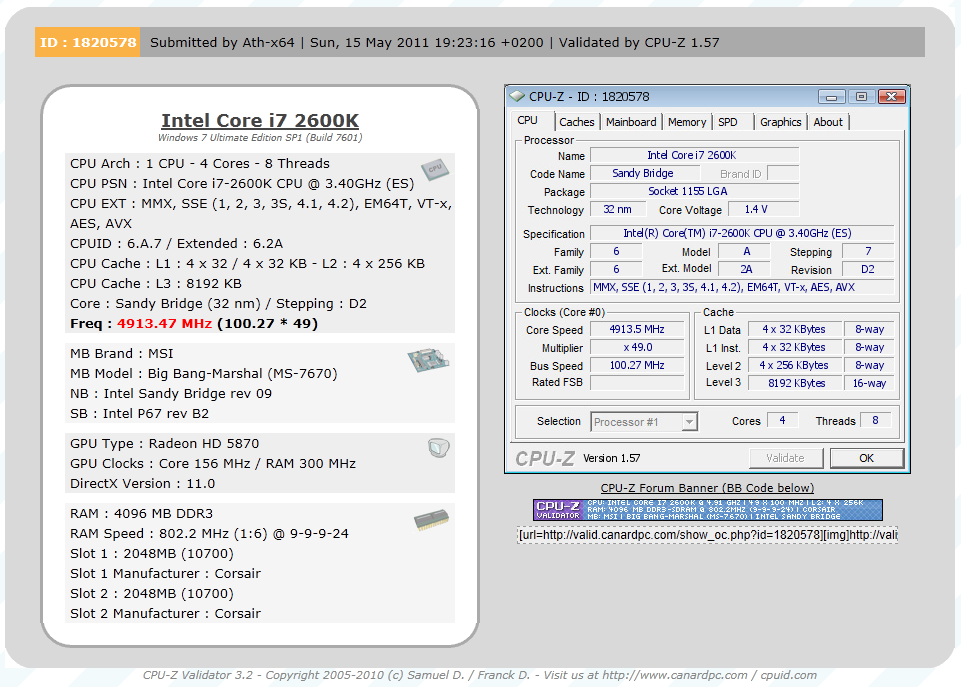
When you bring up overclocking you often hear people talk about Asus, Gigabyte, eVGA and others. You probably do not hear about MSI though. However, we have to say that so far we have consistently gotten our high clocks when we have used the MSI boards we get into the shop (at least on the Intel side of things). For Sandy Bridge the MSI Big Bang Marshal allowed us to push our Core i7 2600k all the way to 4.9GHz and this is with an early BIOS! Can you imagine what you might be able to get with a BIOS that is properly tuned? We also have to wonder what we would get with some extreme cooling (which we are looking into).

Of course overclocking is a picky subject. I can buy to identical CPUs from the store and they will not always perform the same way under stress. This is the same with motherboards, RAM and GPUs. So again it is important to keep in mind that our results represent a specific hardware configuration. Yours may be similar but will rarely be identical.
Overclocking Tools -
Everybody has an overclocking tool and MSI is no exception. In addition to their OC Genie button (and software) you also get what they call the Control Center. This tool is well laid out and clean, in a way it reminds me of the way the overclocking section of the BIOS is laid out. Everything you need is located on one page and can be quickly found and adjusted. You can also save different overclocking profiles that you can save to your system if you want or need to get a quick OC fix later.

You also have the same Green Power page (like in the BIOS). Here you get some of the same options and can also find a good read on how efficient your system is performing. This screen shot was taken during our 4.9GHz overclock and even with the system pushed to the limit we were getting a reading of 86% efficiency. Here you can also turn the board level LEDs on or off, if you care to.
 |
 |
 |


